
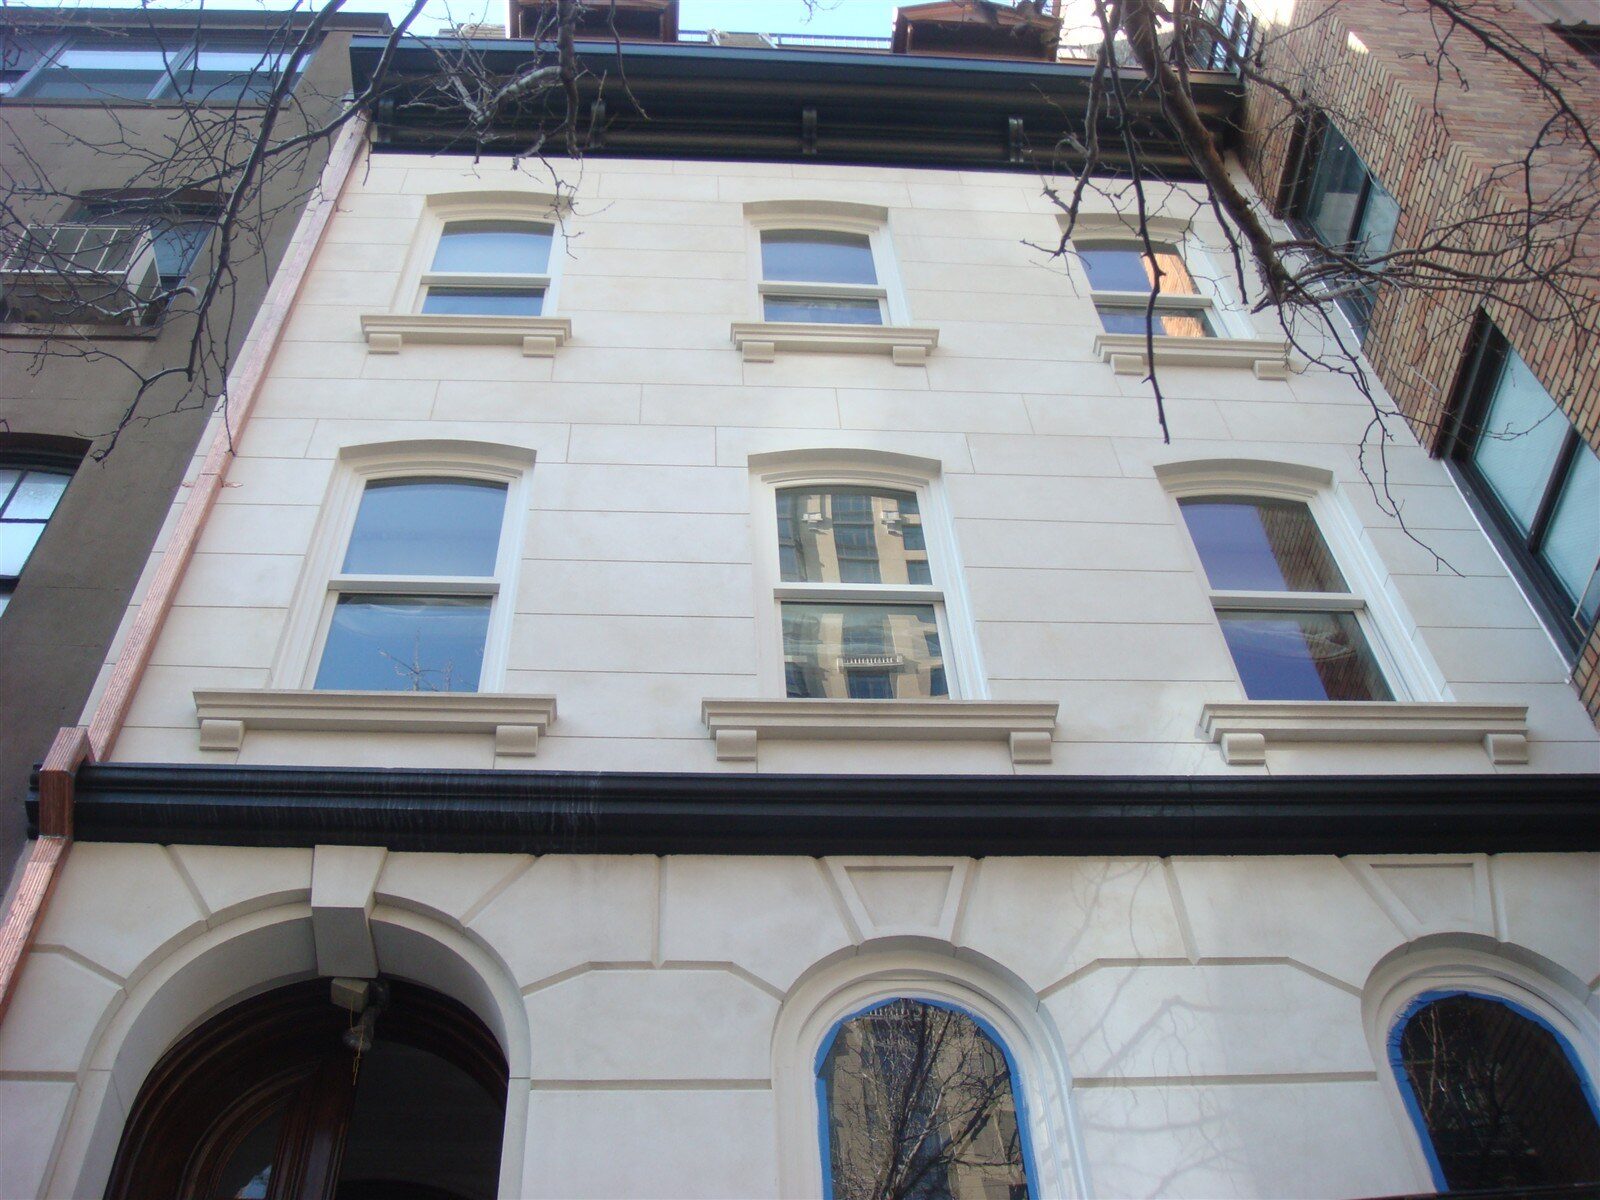
Some projects start with a drawing. This one started with a crack.
The Kim Eng Townhouse is a masonry rowhouse in Midtown East, Manhattan, built around 1910, with brick party walls, a brownstone front, a brick rear wall and a penthouse added later on the roof. For many years it had worn a smooth white stucco skin, and work began to renew it. Within months the new stucco on the front was already cracking and, in places, pulling away from the wall. That is when KOPOS was brought in.
Rather than patch the cracks and hope, the team stopped, looked closely, and let the building show what was wrong. Here is what was under the skin, how it was fixed, and what KOPOS would tell anyone planning a “simple” re-stucco on an old masonry building.
A new skin that wouldn’t stay on
The first step was a full inspection of the façade by the team’s engineer. The findings explained the cracks:
- It went on in the cold. The scratch coat, the first layer of stucco, had been applied at 24°F. The antifreeze additive was only rated to 27°F, and cement stucco isn’t recommended below 40°F at all.
- The lath wasn’t held tight. The metal lath that anchors stucco to a wall should be fastened at least every 12 inches. Here it wasn’t, the scratch coat left bare patches of mesh, and old, rusting edge trim had been reused.
- The protective layer was gone. The tar-based damp-proofing behind the original stucco had been removed and not replaced, and new mesh ran directly over wood window framing with nothing behind it.
- The arches didn’t match. The new custom windows had a different arch radius than the masonry openings. The arches had been patched to fit, and those patches had cracked.
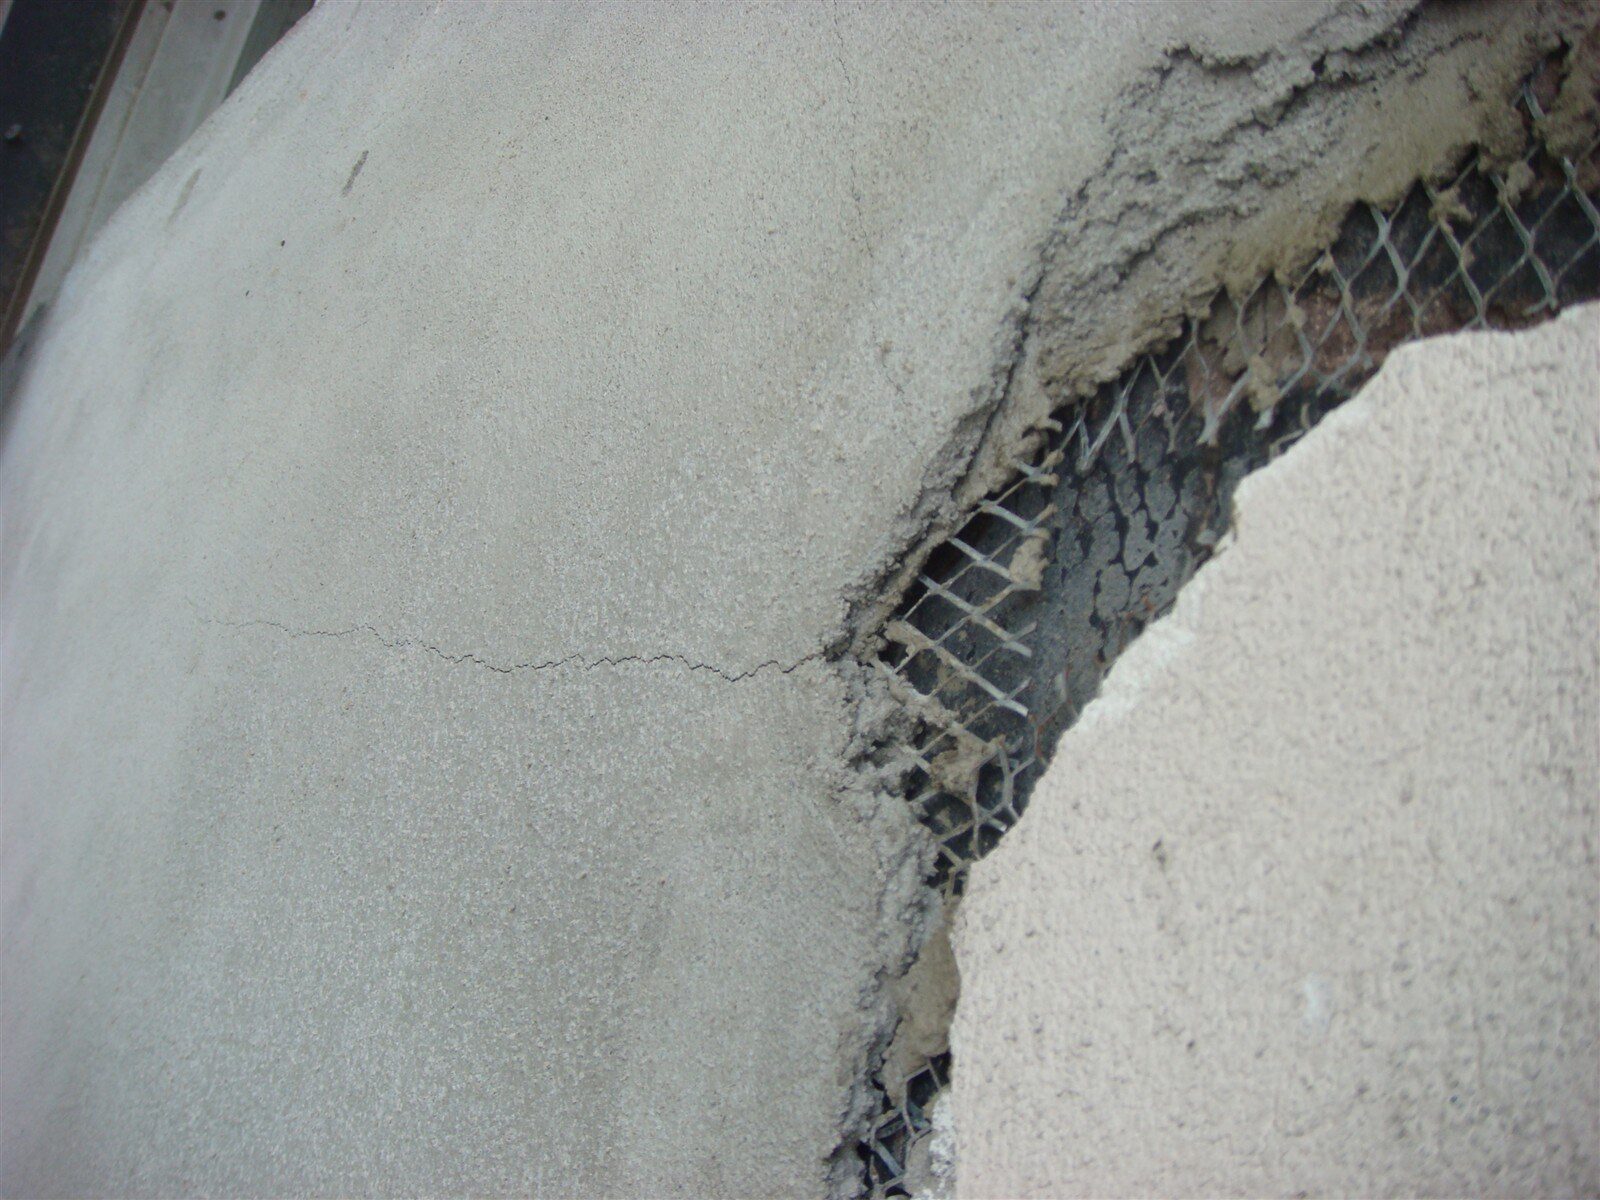
The first recommendation was a careful repair: cut the stucco back to sound material, refasten the lath, add new edge trim, and rebuild the coats in thin layers. But first the team needed to know how much of the wall behind the stucco was actually sound.
Listening to the wall
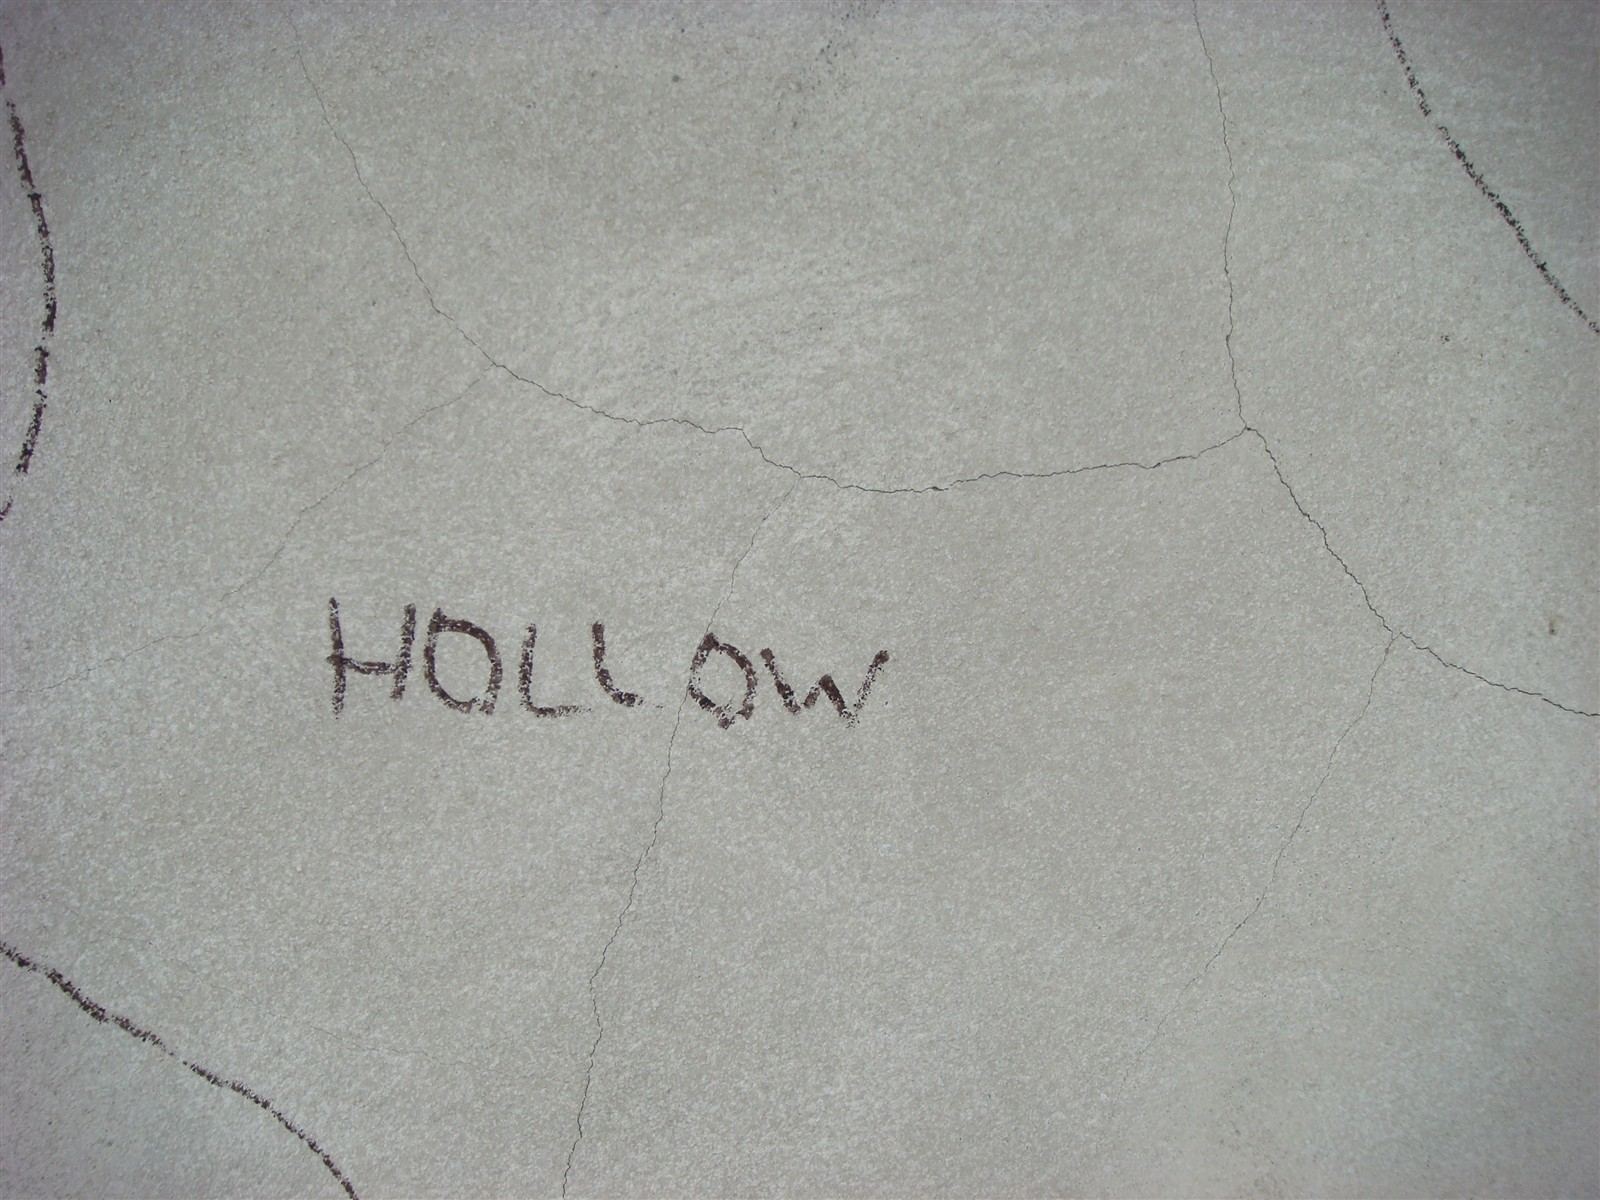
Next, the front was “sounded.” Tapping a wall is old-fashioned but reliable: well-bonded stucco sounds solid, while stucco that has let go sounds hollow. The hollow areas were mapped and marked directly on the façade, and they made the case on their own. There was too much loose material to patch. The front stucco came off, and the original brownstone was exposed.
What was underneath
When the team inspected the bare stone, it was clear the problem went deeper than the stucco.
The front is faced with brownstone slabs about four inches thick, set against a 12-inch brick wall and held by ties that were no longer up to the job. In many places the stone had separated from the brick behind it; you could slide your fingers into the gap.
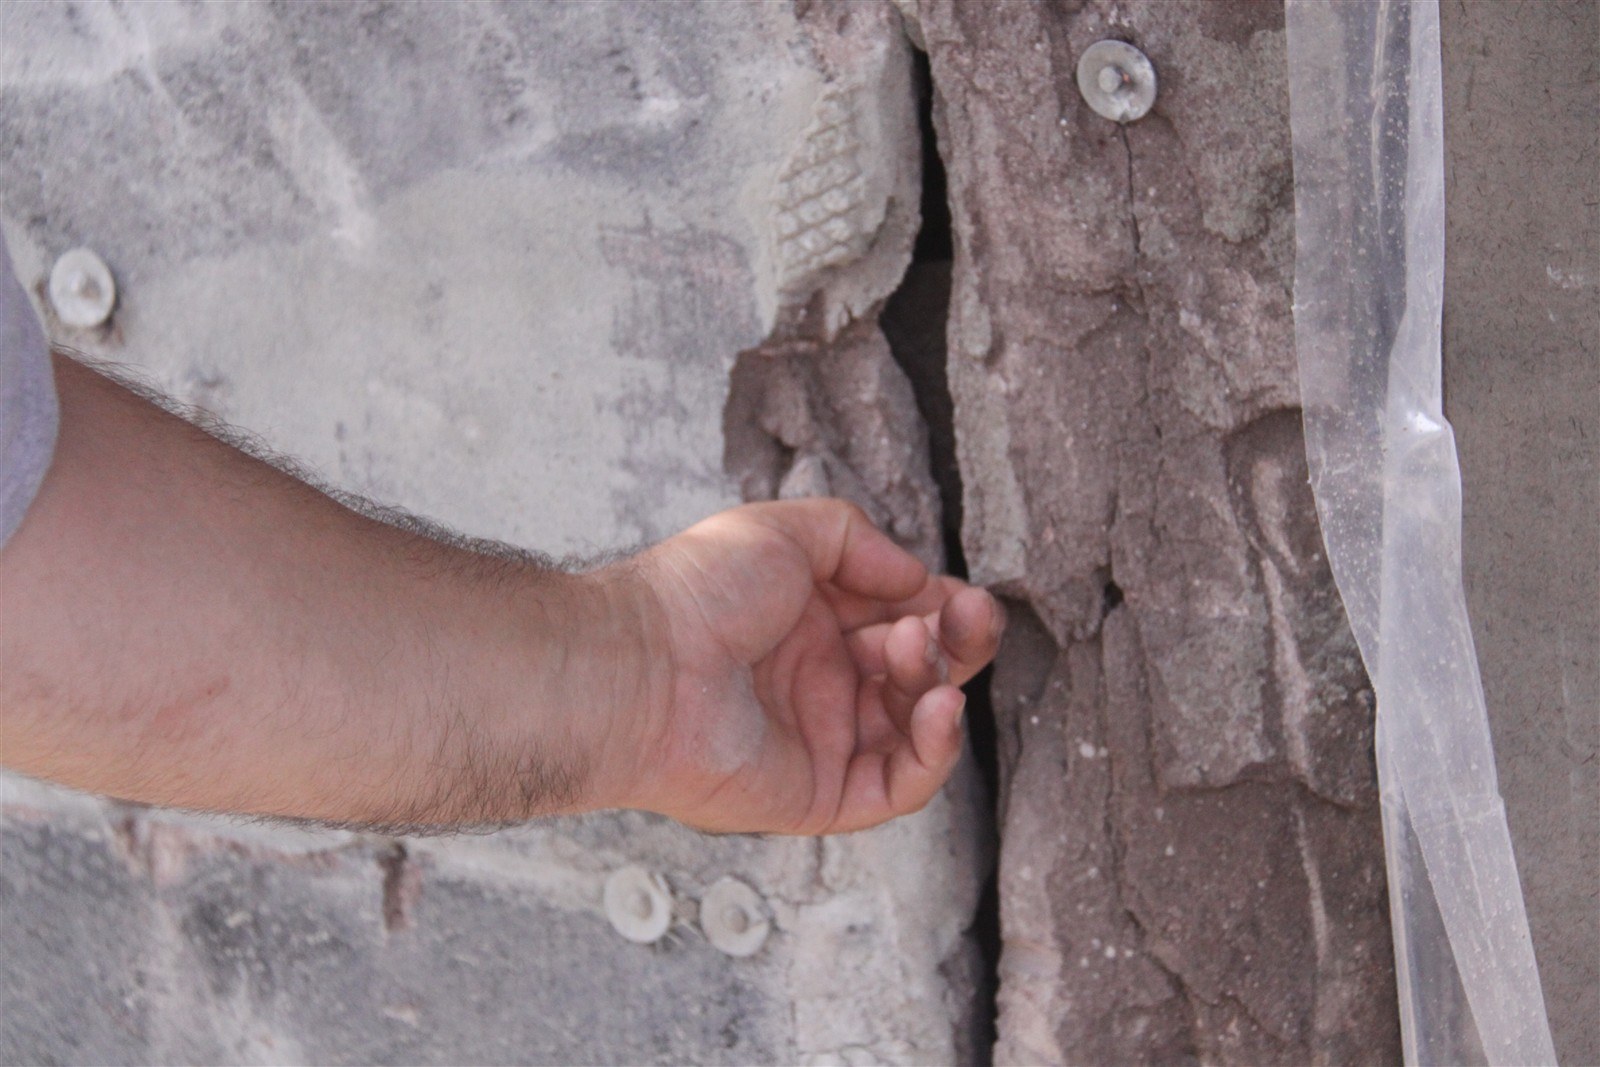
Brownstone is a soft sandstone formed in layers, and on façades the slabs were typically set with those layers standing vertically. Years of freezing and thawing make it delaminate and spall, flaking off in sheets. Earlier stucco campaigns had made it worse: lath had been nailed straight into the soft slabs, and every nail driven in and later pulled out left a spall. In brick, a crack from a nail usually stops at the next mortar joint. A brownstone slab is far larger than a brick, so the crack can run right through it.
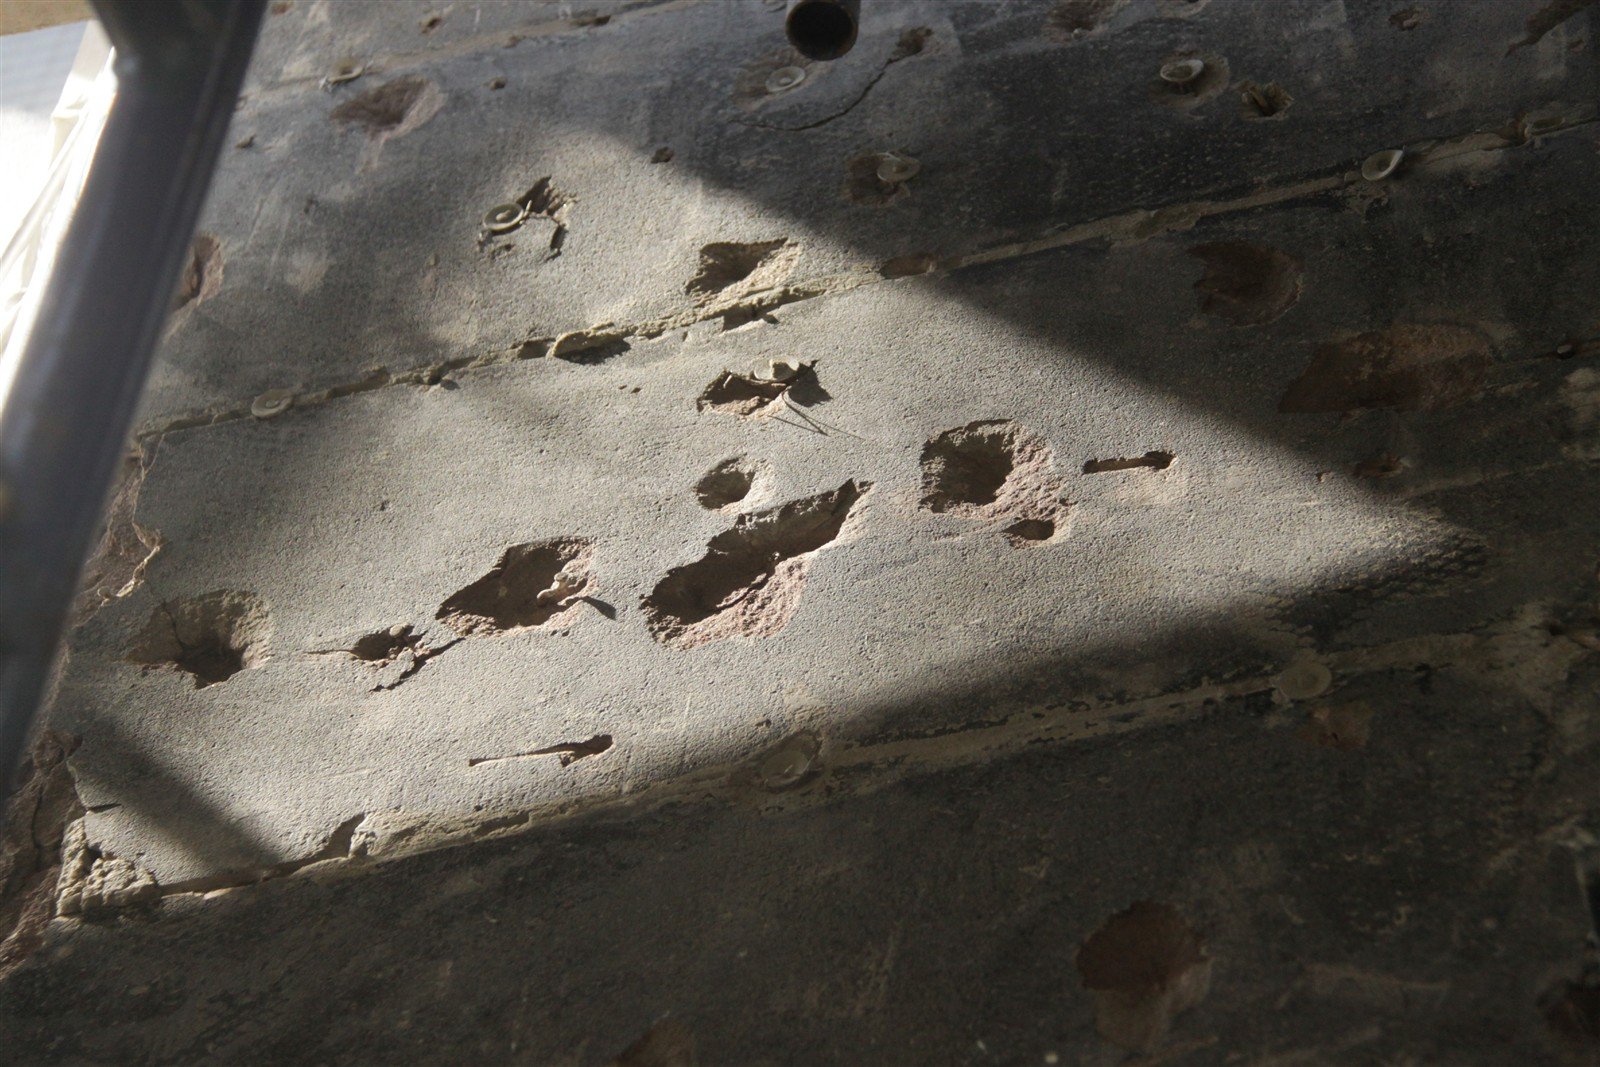
The narrow stone columns framing the windows, only four to six inches wide, had suffered most. Large pieces had simply fallen away, and in spots wood studs had been used in the past to fill the gaps. With the stucco off, the arch mismatch was plain too: the new windows touched the stone at the top center and curved away from it at the edges.
Fixing the stone: pin, patch, rebuild
The repair followed a clear order, and the order matters.
Reattach first. Before any surface work, the loose brownstone had to be secured to the brick backup. Stainless steel anchors were set into the brick on a staggered grid, roughly every 12 to 16 inches, so each slab is held back mechanically instead of relying on old ties.
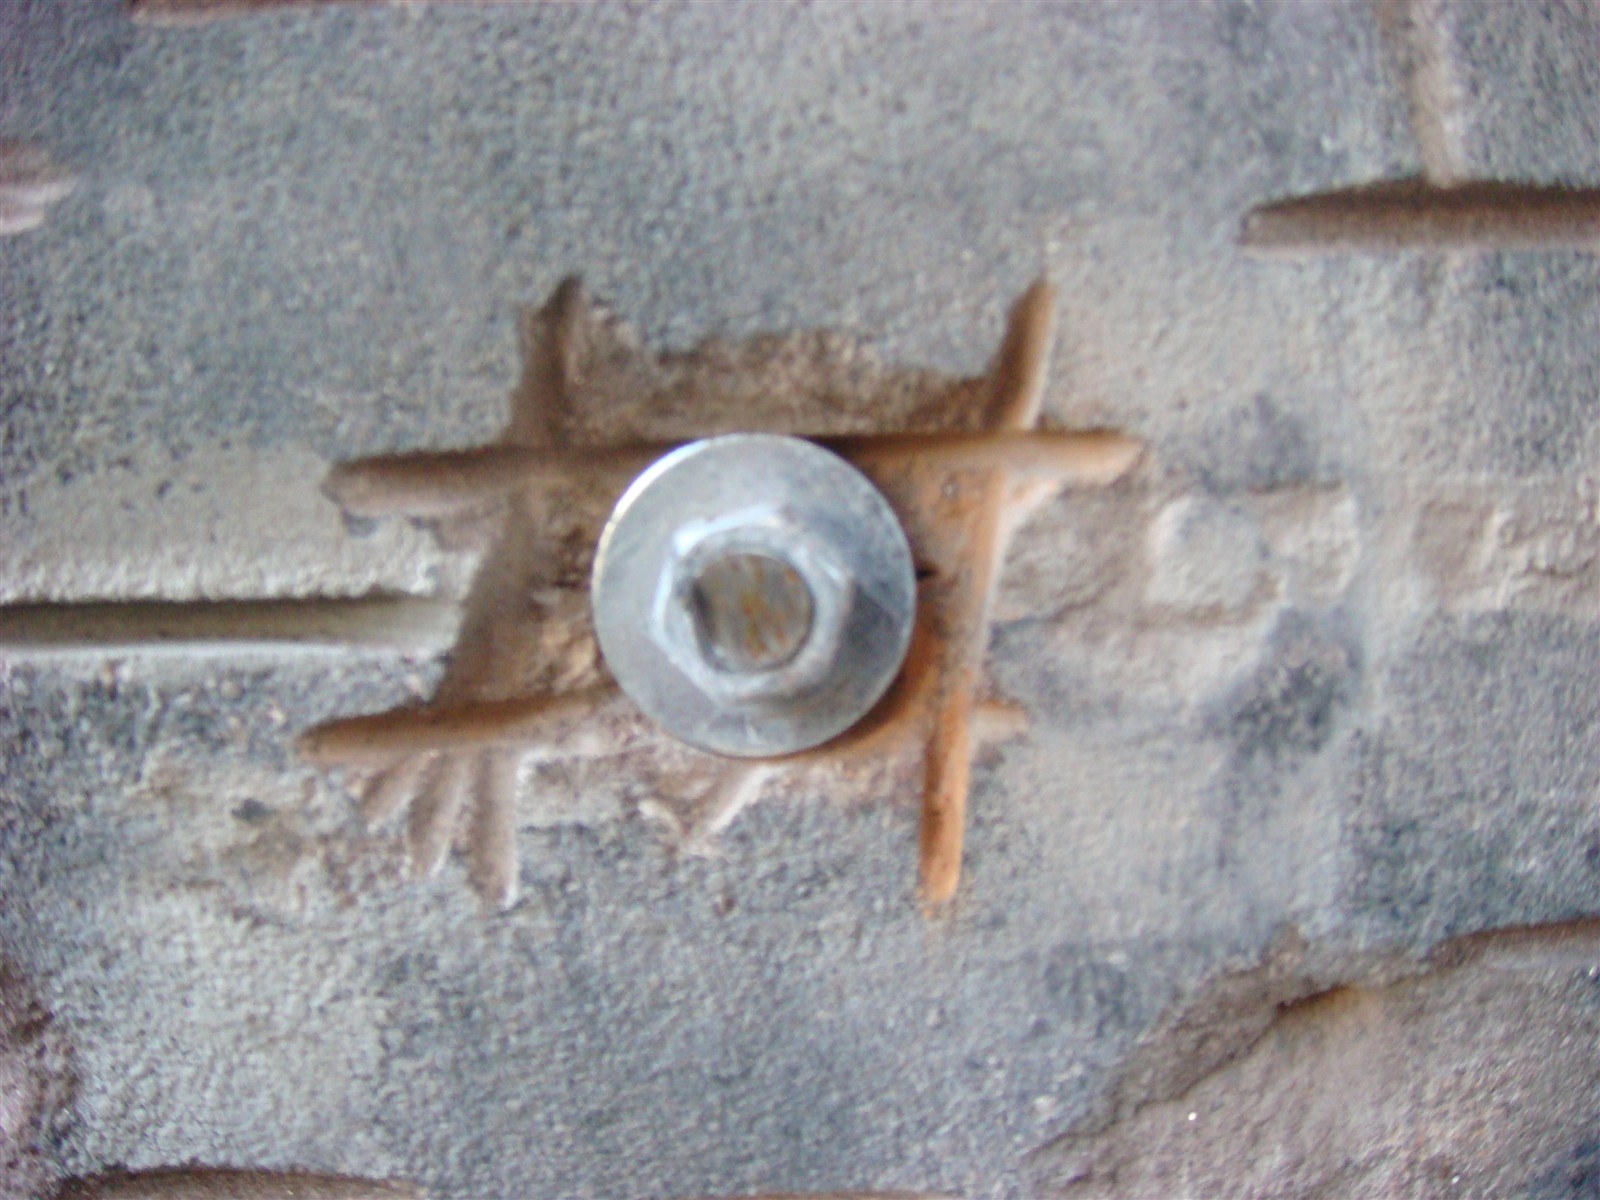
Then patch. Damaged stone was chiseled back to a firm base and keyed so the repair would grip, then built back up in thin layers of a compatible repair mortar, each no more than 3/8 inch thick, over a bonding slurry coat.
Rebuild what’s gone. Where stone was too far gone to save, it was replaced with brick laid in a soft Type N mortar and tied back to the masonry behind it. At the window heads, the specification called for grinding the stone arch back slightly, about 3/4 inch at the center and tapering to the sides, so stone and window would meet cleanly. The window sills were rebuilt to their original profile.
A stucco skin designed to move
Why would the new stucco need joints when the old one had none? There’s a reason the code now requires them. ASTM C1063, the standard for installing lath and cement plaster that the building code adopts, calls for control joints so that no stucco panel exceeds 144 square feet, joints are no more than 18 feet apart, and panels are no more than two and a half times as long as they are wide. The repaired section of the front alone needed at least four.
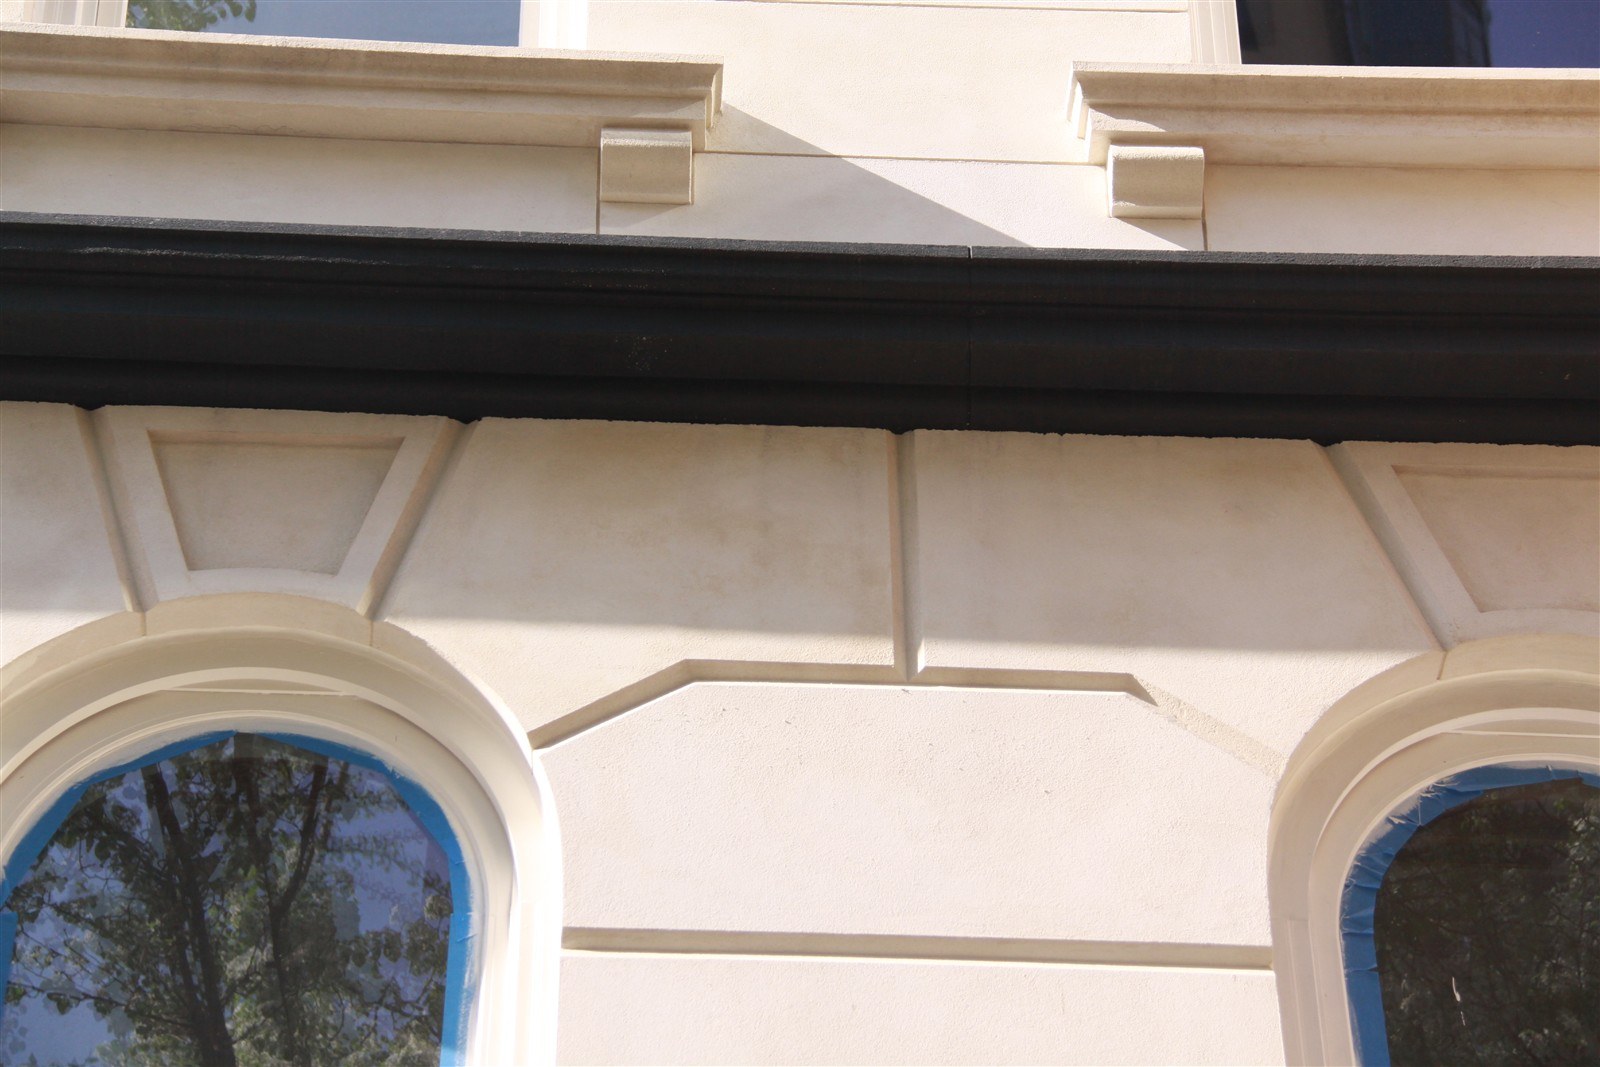
Rather than treat the joints as a necessary evil, KOPOS made them part of the design. The control joints on the finished façade trace the pattern of the brownstone beneath, so the new skin can move with the wall and still reads as a dressed-stone front.
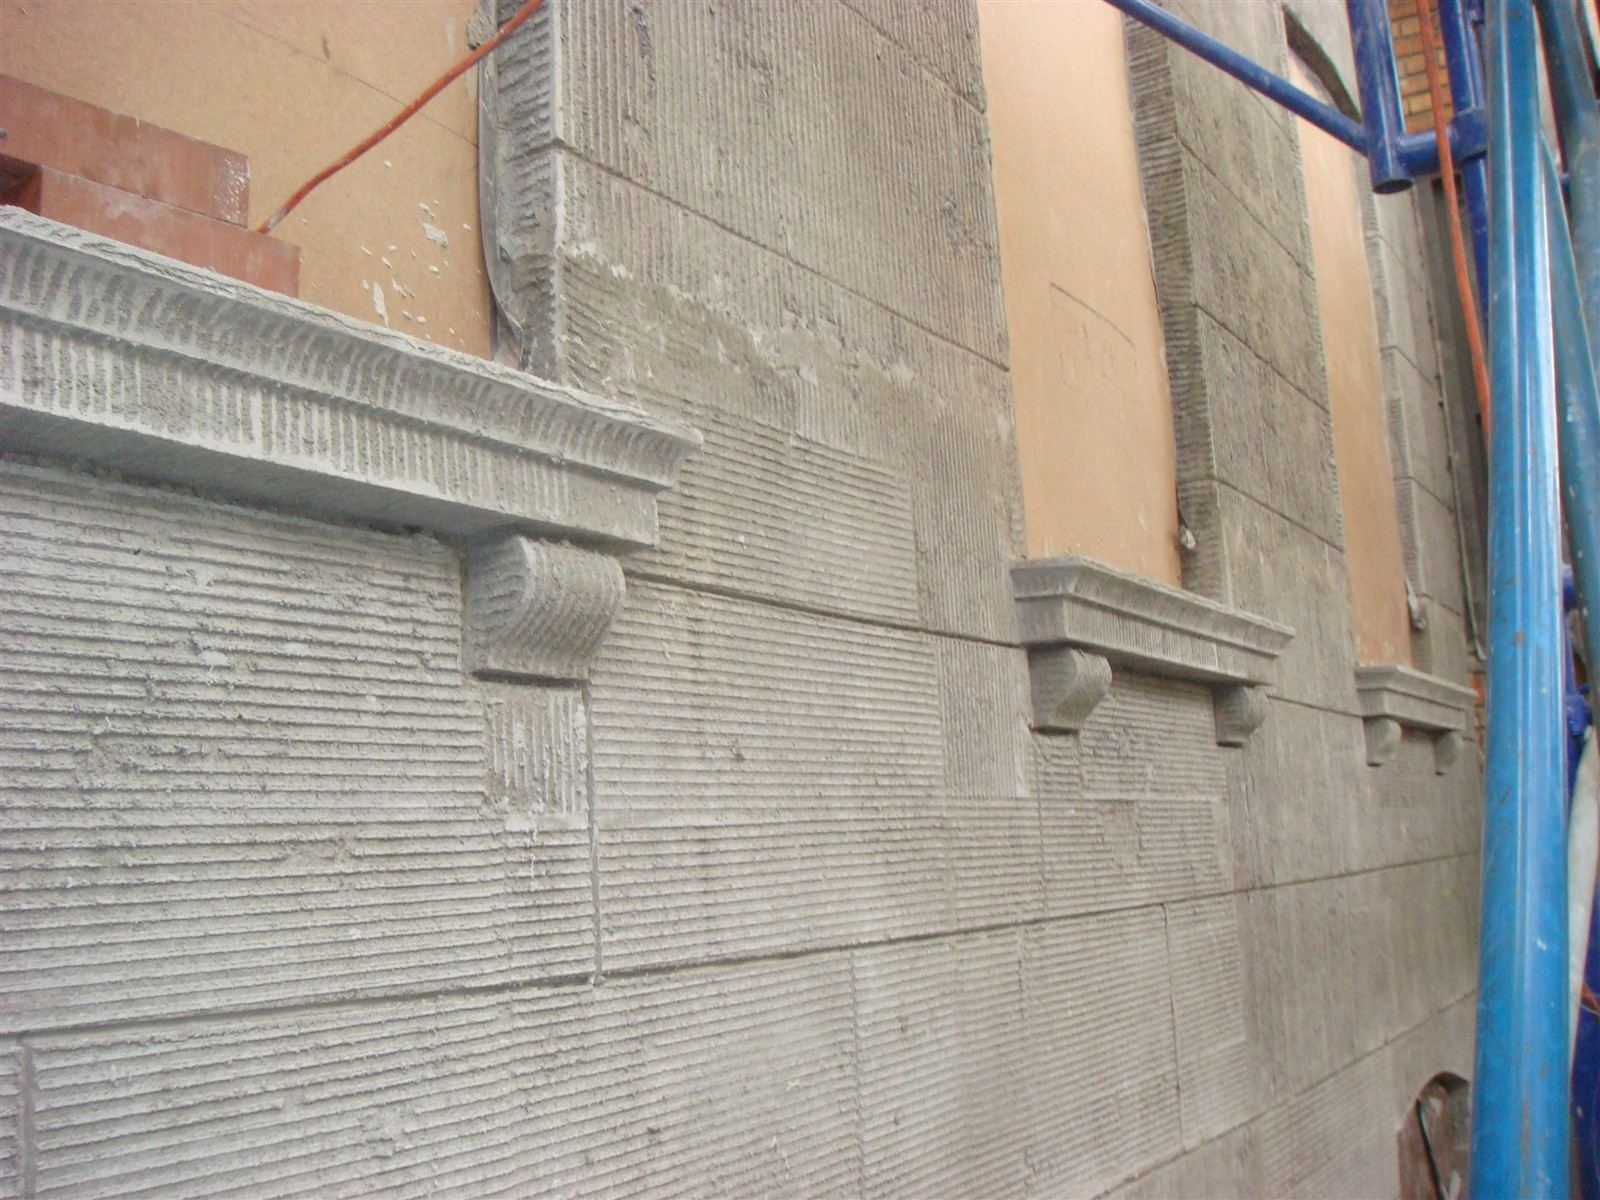
The team also recommended changing how the skin is held on. Instead of nailing lath into the brownstone, which is what damaged it in the first place, the lath could be fastened to the same epoxy-set stainless rods that secure the stone, with small stainless rods, nuts and washers added wherever more hold was needed.
The brick rear façade was re-lathed and re-stuccoed too, with window details drawn to shed water: a J-bead and sealant at the head, and stucco sloped over cement board at the sill to drain.
Water at the base: the terrace, the stoop and the cellar
With the upper façade under control, water at street level was the last piece. After a rain the front steps stayed wet for up to a week, the sides of the garage did too, and water was reaching the garage and the cellar.
The terrace over the garage. KOPOS filed separately to repair the terrace above the garage and the front stoop. The detail layers stone tile on a mortar bed over a Grace Bituthene waterproofing membrane, with Bituthene Liquid Membrane at the edges, carried nine inches up the building wall. Below the membrane, leveling cement slopes 1/4 inch per foot away from the house, and a stainless steel gutter and continuous stainless fascia catch the runoff at the edge.
When the team reviewed the terrace work, the source of the wet walls was clear. The membrane was in, but the perimeter flashing at the wall and edges hadn’t been installed, and the railing posts set into the concrete weren’t sealed. Water was getting around the membrane and soaking into the concrete, keeping the front wall wet. The fix was to cut back the deck where flashing was required and install it, add a flashing collar with a conical cap at each railing post, and sleeve the posts where they were re-welded. For the steps, KOPOS recommended two coats of a breathable masonry sealer, which repels liquid water but still lets them dry out.
The cellar. The rear foundation wall is stone, and after rain it was wet and crusted with efflorescence, the white salts water leaves behind as it evaporates. Retaining walls around the rear yard hold water in the ground against the house. To trace the water, the team brought in a geotechnical consultant and planned a camera inspection of the yard and atrium drains, test cores through the cellar wall, and a test pit. In the end the cracks in the cellar wall were injected with mortar, and together with the flashing correction at the terrace, that stopped the leaks.
The result
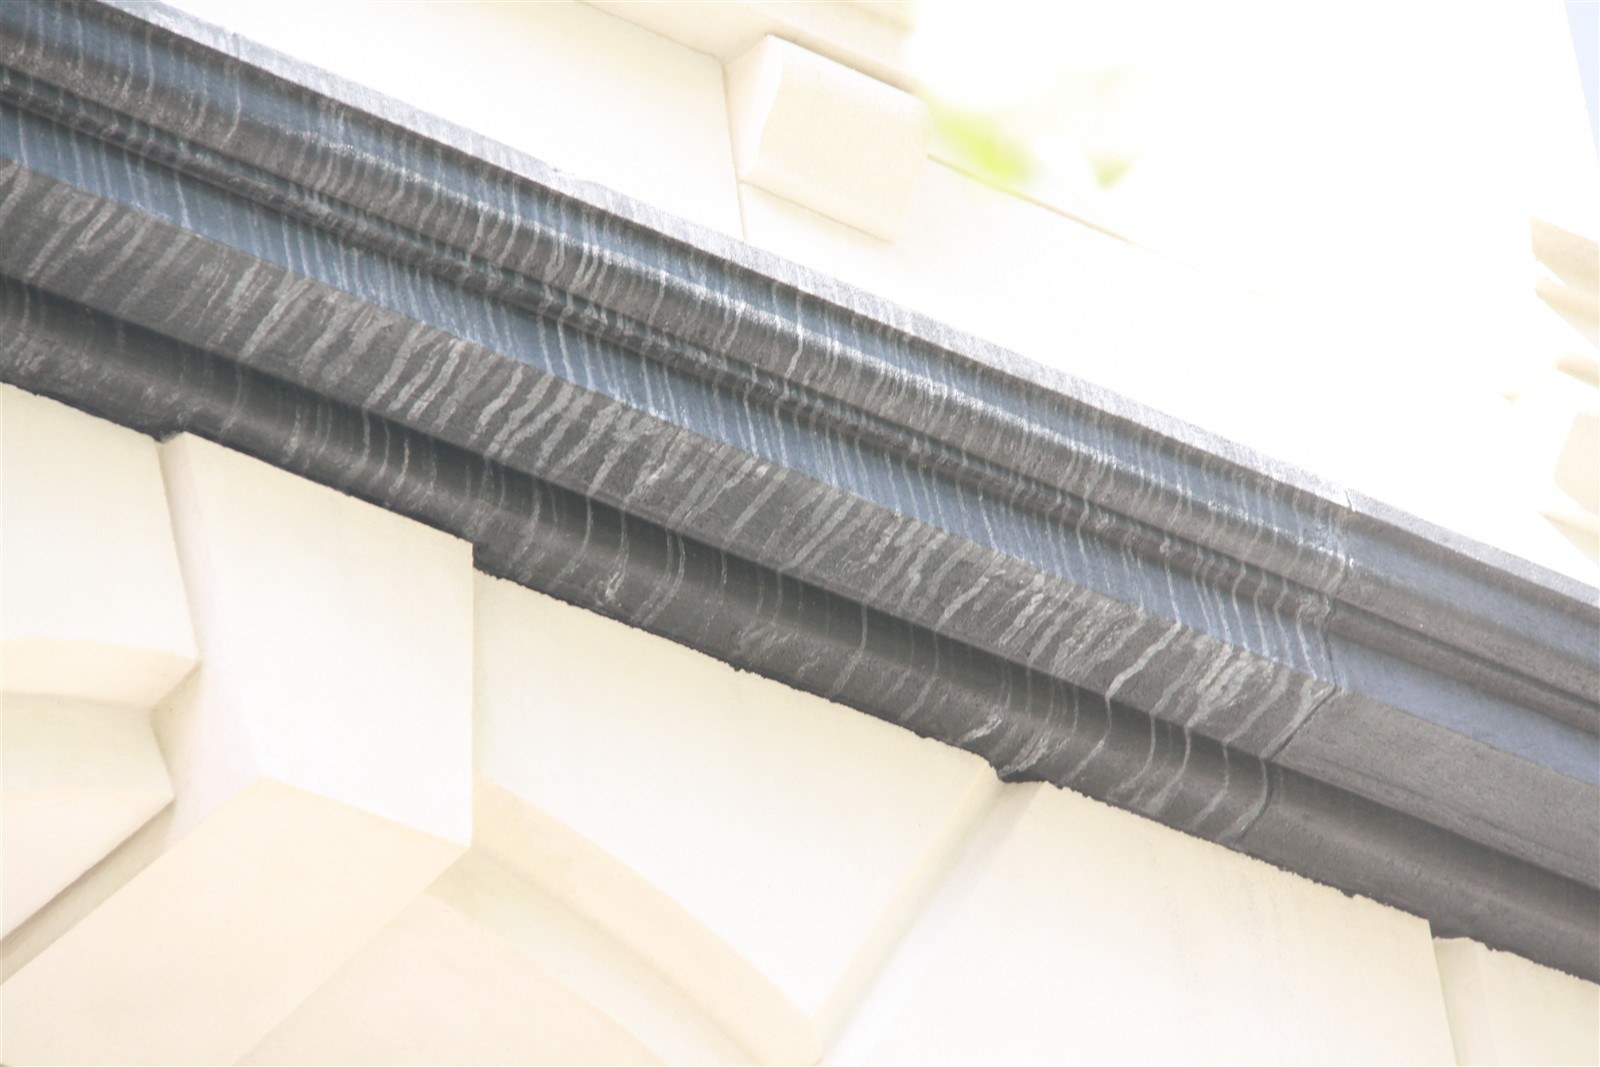
By the end, the front façade was finished: crisp and light-toned, with joint lines that echo the stone they protect. It is now anchored, detailed and drained to keep working. See more of the finished house on the Kim Eng Townhouse project page.
Lessons for owners of old masonry buildings
- Don’t stucco in freezing weather. Cement stucco needs time above freezing to cure and bond. Rushing a façade through winter can cost you the whole façade.
- Never nail into brownstone. Lath and anchors should reach through to the brick backup, ideally with stainless steel, not be driven into the soft stone face.
- Control joints aren’t optional, and they can be beautiful. Lay them out with the building’s own geometry and they disappear into the design.
- A detail only works if it’s built. Much of the water at the front came down to missing flashing and unsealed railing posts. Have someone check the details in the field before they’re covered up.
If you own a brownstone or an older masonry building and something doesn’t look right, or you’re planning façade work and want to get it right the first time, tell KOPOS about your project, and we’ll be in touch. Send a note or call 1.516.966.5900.